Here is the manual for the WordPress Publisher browser extension. If you do not find the answer to your question, feel free to contact us, we will be please to answer your request as best as possible.
Table of Contents
1. What is WordPress Publisher?
WordPress Publisher allows you to post on your WordPress sites directly from the current webpage of your browser. It is particularly fitted for News blogs, where you browse the internet to see which news you will post on your website.
WordPress Publisher has many advantages compared to the native WordPress editor. Elements of the current webpage can be extracted and integrated into your post automatically, easing your editorial process. Some examples:
- Images on the current webpage are automatically detected, and you can set one of these images as your post featured image in one click.
- You may want to add a “Source: <The URL of the current webpage>” at the bottom of each WordPress post. This is easy to do with WordPress Publisher.
- You want to fill in automatically a Custom Post Field, like the URL of the current webpage, or the original Title.
- You have several websites, and you don’t want to connect each time to the WordPress admin panel when you write a post.
- You are blogging “as you browse”. WordPress Publisher lets you quickly write a post about the current article when you read an interesting article on the internet.
2. Basic usage of WordPress Publisher
WordPress Publisher is mainly a sidebar that you can toggle on/off for the current website.
2.1 Toggling the sidebar
To toggle the WordPress Publisher sidebar, simply click on the extension icon. A sidebar should appear.
Alternatively, the default shortcut to toggle the sidebar is Ctrl+Alt+U.
2.2 Customizing the shortcut
You can customize the shortcut by going into the extension options.
<To be completed>
2.3 Accessing the settings
To access the settings, right-click on the extension icon and select “options”.

Alternatively, you can toggle the sidebar, and click on the icon.
2.4 Autosaving & Resetting
WordPress Publisher browser extension has an auto-save feature. Each time your draft is modified, it is saved. If you reload the webpage, the backup is restored, so you should not lose any information.
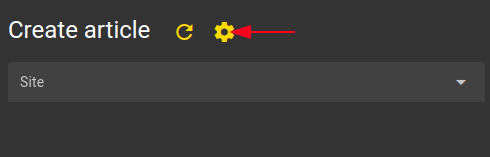
To reset the sidebar and restart your post from scratch, click on the refresh button at the top of the sidebar.

3. Configuring WordPress Publisher
Once the browser extension has been installed, you will need to configure it by adding your first WordPress website. To do it, access the settings as explained above. You will see the list of the configured websites. Obviously, the list will be empty. Click on the icon.
3.1 Configuring a WordPress website
3.1.1 Preparing your website
WordPress Publisher uses Basic Authentication. To enable it on your WordPress website, install a plugin to enable it, like the MiniOrange Basic Authentication plugin. The free version is enough.
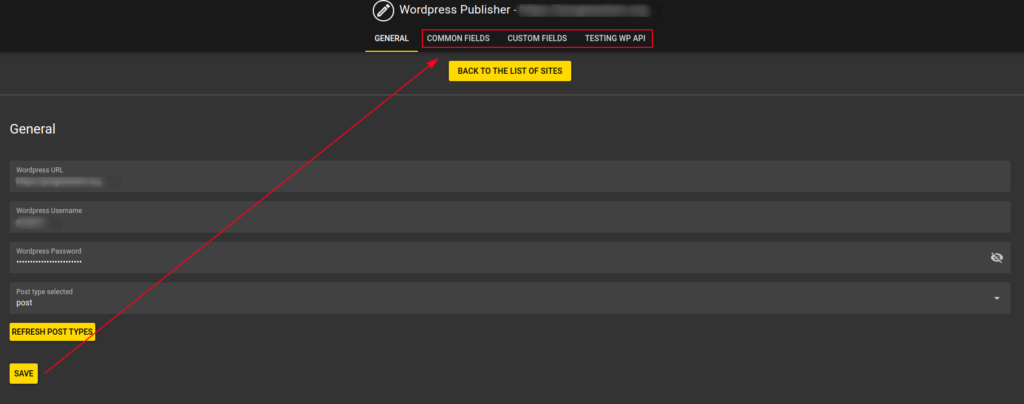
3.1.2 General tab
In the General tab, you will need to enter the URL of your WordPress installation and the authentication credentials. The WordPress URL should not end with an ending slash (/).
Once the URL, admin username and password have been entered, click on the button Refresh Post Types. The list of post types should be displayed. Select the relevant Post Type (in most of the cases, it will be “Post”) and then click on Save.
If you see an error when you click on the Refresh Post Types button, consult this manual’s “Troubleshooting” section.
Once your website is saved successfully, you will have access to the tabs Common Fields, Custom Fields and Testing WP API tabs.
3.1.3 Common Fields
In this screen, you can configure the common (eg native) fields of your WordPress post when they are submitted from the WordPress Publisher browser extension.
3.1.3.1 Post default status
Select the default status of the post created. By default, any published post will have the “draft” status. Keep in mind that the status can be changed on a per-post basis.

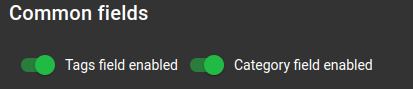
3.1.3.2 Common fields – Tags and Category
This option allows you to disable tags or the category, meaning that the corresponding fields within the sidebar will be hidden.
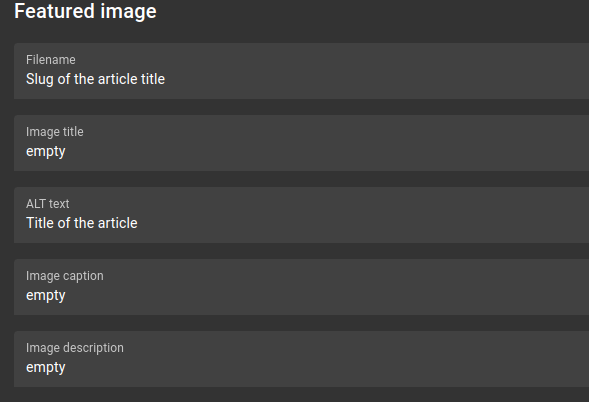
3.1.3.3 Featured image
This block of options allows you to configure all aspects of the featured image. When you browse a webpage and toggle the WordPress Publisher sidebar, all images of the current webpage will be detected and proposed to be set as the featured image of your blog post.
You can configure the following options.
Featured image filename
The image filename can be kept, or the file can be renamed before being uploaded which can be useful for SEO purposes. If the file is renamed automatically, the filename will change to the slug of the blog post title.
Image title
The image title is useful for users with screen readers and accessibility needs. Usually, the title appears when you hover your mouse over the image. It can be useful for SEO too. By default, the title will be empty. You can select the following options:
- Existing Image meta title: if there is a title attribute in the original image, it will be duplicated.
- Static value: You can set one unique static title for all images.
- Title of the article: This option will set the WordPress post title as the image title.
- Set manually each time: If this option is set, a field will be displayed in the WordPress Publisher sidebar to allow you to enter the title of the featured image each time.
ALT text
The ALT (Alternative) text is also useful for accessibility needs and SEO purposes. You can select one of the following options:
- Empty value: The value will remain empty for all featured images.
- Title of the article: The ALT attribute will be set to the title of your blog post.
- Set manually each time: You will be able to change and set the ALT attribute manually for each blog post.
Image caption and image description
Both options allow you to set up the caption and description of the featured image. The options available are identical to the Image title above.
Fields filled automatically
In this section, you can fill automatically the title or a part of blog post content. To see how it works, refer to the section Automatic filling of fields.
3.1.4 Custom fields
In the Custom fields tab, you can configure the Custom Post Types accepted by your WordPress installation. You can add, edit, and delete any number of custom fields you want.
Each custom field has the following parameters:
| Field | Explanation |
|---|---|
| Label | This is the label that is displayed in the Sidebar. Each custom field created will add a custom control in the Sidebar so you can fill it accordingly. |
| Type | The type of control that you want to set up within the Sidebar. Accepted values are Text, Dropdown, Checkbox, Radio buttons, Multiline text, and Multiline Formatted text. |
| Variable | The name of the Custom Post Field in your WordPress installation. Example: if you use the plugin Advanced Custom Fields in your WordPress installation, the name of the variable will be acf.<variable_name> |
| Default value | When you start a new article, the custom field value will be set to this default value. |
In addition to these elements, you can disable a Custom Field without deleting it.
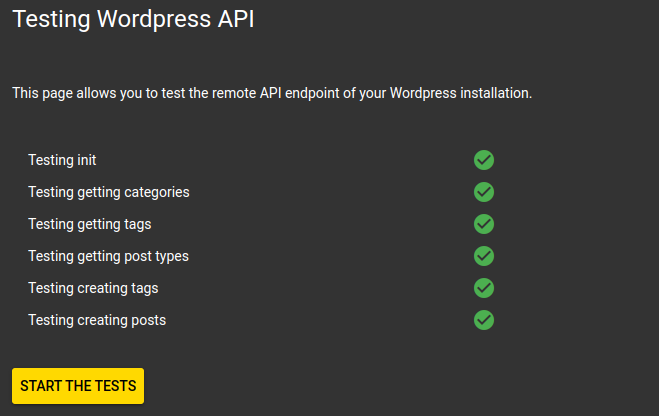
3.1.5 Testing WP API
It’s always good to check that there is no issue with your WordPress installation. The Testing WP API tab enables you to check if everything will work. Click on the tab, and then click on the Start the test button. If there is no error, you should see this after a while:
3.2 Global configuration
The global configuration enables you to define the visibility of the Sidebar, either for all websites or for specific ones. Furthermore, you can also configure the automatic filling of post fields based on the current website you are browsing.
3.2.1 Default configuration for all domains
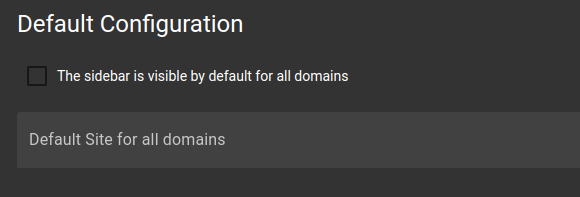
You can select the default visibility of the Sidebar for all domains. By default, the Sidebar is hidden and you need to click on the button extension to display the overlay.
If you have multiple WordPress websites, you can also select the default website that will be selected when you open the Sidebar.
3.2.2 Rules per domain
You can also select the default visibility of the Sidebar and the default website on a per-domain basis. As an example, you may want to toggle automatically the WordPress Publisher sidebar each time you browse CNN.com.
[To be completed]
4. Exporting and importing your configuration
Depending on the number of WordPress sites you manage, and the number of Custom Post Fields and rules per domain, your configuration can be quite sophisticated and customized. Therefore, WordPress Publisher contains a backup and restore feature.
To access it, go to the settings of the extension, in the Export/Import configuration tab.
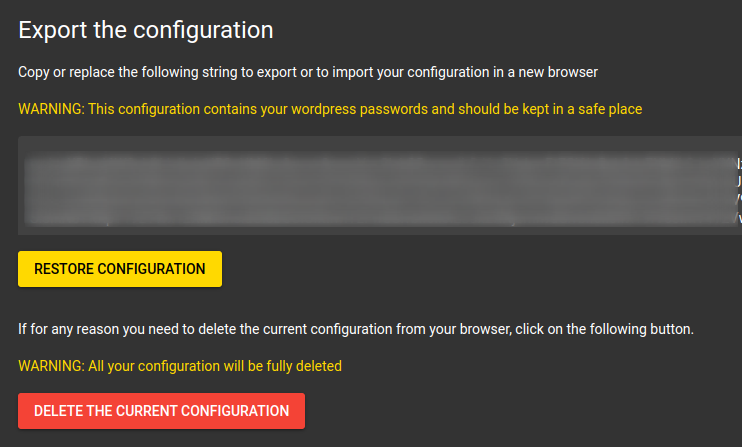
Your configuration is shown as a Base64 encoded string. You can copy-paste it into a safe place to backup your configuration. Please note that this string is not encrypted and contains your WordPress credentials. So ensure it is saved securely.
Just paste your configuration and click on the Restore Configuration button to restore it.
If you want to delete the existing configuration, just click on the red button. All data configured will be irremediably deleted.
5. Automatic filling of fields
WordPress Publisher allows you to fill automatically post fields or custom post fields. As an example, you may want to add automatically the source of your post in your post content. You can also set up automatically a custom post field according to your needs by extracting automatically an element of the current webpage, either on all websites or on specific websites.
This section describes the syntax used.
5.1 How does automatic filling work
For your post Title or Content, you can configure an expression that will be evaluated in the context of the current webpage. This expression will extract an element of the current page, and insert it in the field automatically. It can also be done for any of your Custom Post Fields.
The expression can contain predefined variables or a query selector. You can also add a modifier, that could be used, for instance, to transform the extracted text to uppercase letters.
An expression can contain any text, with variables. Variables are surrounded by {{ and }}. A modifier can be applied to a variable or a query by appending a | to the variable with the modifier name.
Example:
The current URL is {{ hostname|uppercase }}If you enter this text in the configuration, the text displayed when you’ll browse the homepage of cnn.com will be:
The current URL is CNN.COM5.2 Predefined variables
The predefined variables are available:
| Variable name | Value |
|---|---|
| {{ url }} | The current URL (https://cnn.com/current-article) |
| {{ hostname }} | The current hostname (cnn.com) |
| {{ site }} | The link to the homepage of the current site (https://cnn.com) |
| {{ path }} | The path of the current site (/current-article) |
| {{ title }} | The current title of the webpage |
| {{ shortHostname }} | The first word of the hostname (except www prefix). For https://cnn.com, it will give “cnn”. For https://www.bbc.co.uk it will give “bbc”. |
5.3 Available modifiers
The modifiers allow you to format the output of an expression. Currently, the number of modifiers is limited to:
| Modifier | Effect |
|---|---|
| uppercase | Transform the output to uppercase letters |
| lowercase | Transform the output to lowercase letters |
| capitalize | Capitalize the first letter of each word |
5.4 Query selector
In addition to predefined variables, you can extract anything on the current webpage using a query selector. The syntax is as follows:
The first H1 is {{ query('H1').textContent }}The accepted argument of the query function is the same as the argument accepted by the Javascript document.querySelector function.
Instead of textContent, you can also choose between: innerText, innerHTML, and getAttribute. Each of these attributes has the same usage as its javascript counterpart.
The getAttribute function needs a parameter. It will enable you to retrieve an attribute of an HTML element.
Example:
Let’s say you want to retrieve the link of the author’s bio on a news website. The HTML code where you get the news contains this:
<a class="author" href="/author/john-doe">John Doe</a>You can enter the following expression to get the absolute URL of the author’s bio webpage:
Bio of the author available <a href="{{ site }}{{ query('a.author').getAttribute('href') }}">here</a>The output will be:
Bio of the author available here (with a link on the word here to the absolute URL of the author's page) 6. FAQ
6.1 Troubleshooting an issue with your WordPress installation
If you cannot publish a post, it’s likely you have an issue with your WordPress installation. To troubleshoot the problem, you need to toggle the Developer toolbar (Ctrl+Shift+I on Google Chrome). Then, you can go to the Network tab, and retry to publish your post.
You should see the problematic request sent to your WordPress site in red. Click on it, and see the response sent by your WordPress installation. Based on the response, you will have a clue about the issue.
If this is not enough, feel free to contact us with the result of the operation above.
6.2 WordPress Publisher cannot connect to my WordPress site
Check the following:
- Ensure that you have installed the MiniOrange Basic Authentication plugin, to enable the basic authentication.
- Ensure you are not logged into your WordPress with the same browser while using the WordPress Publisher Browser extension. This is a known issue: an existing session on your WordPress site interferes with the authentication made by the WordPress Publisher if both are made by the same browser.
6.3 How can I add the source to credit at the bottom of each of my posts?
For news websites, It’s very common to link to the original source article. To achieve that with WordPress Publisher, you can add the following expression, in the content section of the Common Fields tab:
<br><br>
Source : <a href="{{ url }}">{{shortHostname|uppercase}}</a>
This will add automatically the current linked URL as the source.
6.4 What are the current limitations of WordPress Publisher?
There are some limitations that we are aware of. You will find below some of them:
- It’s not possible currently to enter more than one category
- Setting up Excerpts from the extension is not supported
- Setting up Meta description from the description is not supported
We are working on these features.
6.5 How to get some support?
You can contact us. This extension is still in beta, so we’ll be glad to help you and correct potential bugs.
6.6 Are you open to partnerships?
Yes. If you want a custom feature, feel free to contact us. Also, if you have new ideas, suggestions, etc. do not hesitate to contact us.